Equipment
There are many companies that manufacture flashes for cameras. Some can be mounted onto the camera’s hot shoe, while others are the big studio lights. For the purpose of this tutorial we’ll stick to the hot shoe flashes as they are most compatible with the many flash control and exposure functions on today’s cameras.
All you’ll need to follow along is a Digital SLR and a hot shoe flash by your camera’s manufacturer. Canon has their Speedlite EX series and Nikon has their Speedlight SB series. The flash should also be one that can act as a controller (Master) for other flashes.
Canon Speedlites that can Master:
- 580EX (discontinued)
- 580EX II
Nikon Speedlites that can Master:
Both manufacturers, Canon and Nikon, have a wide selection of flash units for many applications. However, only their top-shelf flashes can be Master units. Their lower-end models such as the Canon 430EX II and the Nikon SB-600 can only be remote slaves during wireless/remote flash photography.
There are some DSLRs that are able to utilize the camera’s built-in pop-up flash to control other remote flashes such as the Nikon D700 and the Canon EOS 7D. This can be beneficial if you already own a hot shoe flash because you can now move it off-camera and still control it. Check your camera’s specs to see if your model can utilize the built-in pop-up flash in "Master" or "Commander" mode.
How Exposure is Controlled
The camera gives the photographer three ways to control the light:
- Shutter Speed
- Aperture Setting (f-stop)
- ISO Setting
Adding flash to a photograph gives the photographer a fourth handle of control on the situation by being able to add his/her own light. Otherwise, a photographer is limited to what the ambient lighting situation can provide. Sure, one can use spot lights, reflectors, scrims, etc. but that is not what is going on here.
We’ll be taking a look at the functions available when one purchases a hot shoe flash such as a Canon Speedlite 580EX II or Nikon Speedlight SB-900. We’re not going to cover all the bases, that’s why you have a manual, but only the most common functions.
TTL Flash Control
TTL means "Through the Lens" and is an included light-metering feature on almost every single digital camera out there. Canon has its E-TTL and Nikon has its i-TTL. What camera companies have done is move the handheld light meter inside the camera so it measures a scene’s luminosity, color, etc. through the lens of the camera.
The camera then makes a judgement and notifies the photographer if a scene is too light or dark for a particular shutter-aperture-ISO combination. In automatic modes the camera makes the adjustments for the photographer. In Manual mode ("M") the photographer makes the adjustments.
A scene’s lighting information is passed to the TTL-enabled flash unit and will fire a certain amount of light. This amount can be automatically or manually determined. Even in automatic modes, you can still adjust the flash output to a particular ratio that is dependent upon the TTL metering system’s analysis. This proportionate flash setting is Flash Exposure Compensation.
Flash Exposure Compensation
The controls for adjusting a flash’s output utilizing TTL metering are almost identical to adjusting the camera’s exposure compensation, also called Exposure Value (EV). You can not only adjust the built-in flash’s output but also that of the TTL-enabled flash unit.
This allows the photographer to control the flash anywhere within the typical 5-stop range displayed. The flash output can be set above, below, or equal to the camera’s EV.
Flash Exposure Compensation using TTL metering is an excellent, quick, and fairly accurate way to balance the flash-ambient exposure in a variety of ways, achieving the desired look. For example, a flash can be set to -2/3 stop to fill in shadows without affecting the highlights or midtones.
The flash can also be used to over-power the ambient or balance 50-50 with it. So, you can set your flash to a consistent output that adjusts to the scene.
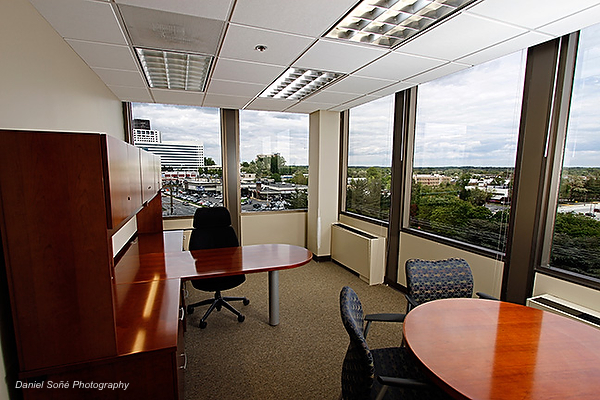
In the above example, I used the ambient as my fill and my strobes as the main. I did it this way to eliminate as much of that nasty flourescent green tint as I could while still maintaining a warmth to an otherwise sterile-feeling room. So, I over-powered the ambient for the sake of removing color-cast and providing a more interesting scene.
Flash Exposure Bracketing
Flash Exposure Bracketing (FEB) works the same way that Auto Exposure Bracketing (AEB) works with the camera. In this mode the user can select the different flash outputs in 1/3, 1/2, or full stops. Use this mode to get different shots with flash. The usual number of different flash outputs is three. So, the first exposure can be set at 0, the second at +1, and the third exposure set to -1 1/3.
There are many other combinations that can be employed which will give different looks because of the varying flash. This is useful when doing quick n’ dirty LCD evaluations of how much flash looks right.
Flash Exposure Lock
Flash Exposure Lock (FEL) is a useful way to quickly force your flash to consistently output a particular EV of flash. This is particularly useful if the TTL-controlled flash is being inconsistent, or in high-contrast, backlit, or other scenes which confuse the camera’s metering system.
FEL is also useful when the TTL flash output keeps varying despite the fact the scene has not really changed. For example, if a person is wearing a white shirt, the camera’s metering may believe the scene got brighter even though it did not. Then, in that same scene a person with a dark-colored shirt steps in. Again, the flash TTL ends up over-exposing. Utilizing FEL locks in the flash’s EV regardless of the TTL readings.
Manual Flash
Manual flash is the most tedious, but like the Manual mode on the camera, it offers the most control and precision. Top-of-the-line flash units offer 1/3-stop increments ranging from 1/128 power to 1/1 and zoom control from 14mm to 105mm (Canon) or 200mm (Nikon SB-900). The benefit of Manual flash is consistent flash output. Once set, the flash will output the same power and beam exposure after exposure.
- Typical power settings are, from highest to lowest, are (full stops): 1/1, 1/2, 1/4, 1/8, 1/16, 1/32, 1/64, and 1/128.
Manual flash enables the photographer to have a constant factor during a shoot, even when the ambient lighting changes. It also allows the photographer to use the shutter speed to dial up or down the ambient light, treating them as two separate light sources. Even though the photographer may adjust his shutter speed by 2 or 3 stops, the flash will pop the same amount of light with the same spread shot-to-shot.
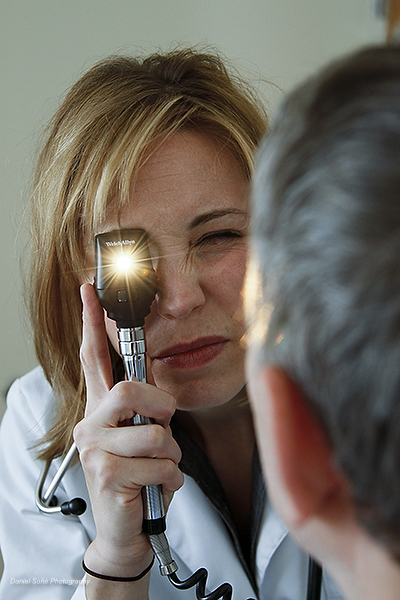
This photo was accomplished with Manual flash because the darkness of the room, combined with the light emanating from the opthalmaloscope, was making my TTL readings jump all over the place. TTL-controlled flash would have eventually gotten it right, but probably only after a bunch of misses. Remember, TTL-flash adjusts itself relative to your metered exposure.
Additionally, Manual flash operates outside the typical 5-stop range available in TTL systems. Sometimes, +2 or even +3 stops of flash is not enough to over-power the sun. This is true when using small flashes. Big studio flash — not so much.
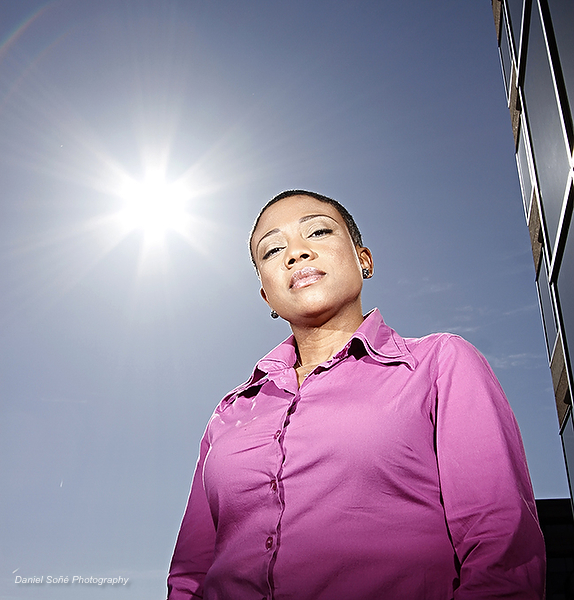
In the photo below, I used two 580EX II’s to over-power the unobstructed afternoon sun. The sun was so bright that even though I was using two flashes and +3 stops their output with 105mm zooms, it was not enough. In those situations TTL settings may not be enough. I put them into Manual mode and set them to 1/1 power — the maximum. Mission accomplished.
Flash Head Zoom
Flash head zoom is the amount of spread the beam of light has, and it corresponds to the field of view a lens would have a certain focal length. In TTL mode, the flash’s zoom changes to match as closely as possible the zoom of the lens so that the flash covers that field of view (FOV) as much as possible.
What also changes is the "throw" or distance which the light reaches. Also changing the zoom setting on the flash varies the intensity of the light too.
The reasoning behind the zoom features on a camera’s flash is the same as the one used on flashlights that allow the user to control the spread of the beam (i.e. Maglite). Zoomed out, the light is spread over a wide area and is not so intense. Zoomed in, the photons are packed tightly together and the intensity goes up.
- Typical zoom settings are: 14mm, 24mm, 28mm, 35mm, 50mm, 70mm, 85mm, 105mm, and 200mm.
Controlling the spill of light is another useful control the photographer has when lighting photographs with flash. For example, one can place a flash somewhat close to the subject and zoom the flash to snoot the light which lights only a portion.
Another example is zooming in the flash tightly to allow the light to reach farther, even across a basketball court. Zooming out, say to 14mm, is a great way to provide (fairly) even lighting for groups.
High-Speed Sync/Focal Plane Flash
High-Speed Sync/Focal Plane Flash is a useful mode when the photographer needs to use a shutter speed beyond the maximum flash-sync speed on the camera, usually 1/250sec. Setting the flash to this mode allows the photographer to use any shutter speed desired, even 1/8000sec. This is useful if the photographer wishes to use fill-flash in Aperture Priority (Av) mode.
What happens in this mode is the flash pulses at a high frequency during the exposure rather than just a single pop. The flash pulses to ensure even coverage across the image. The trade-off to this mode is that the flash sacrifices power, so the flash must be placed closer, sometimes much closer, to the subject.
Action can be frozen in midday sun and shadows filled-in, provided the flash is close enough. Remember, the higher the shutter speed, the closer the flash needs to be. To maintain the same distance, increase the EV and/or zoom in the flash head.
This one was 1/800sec @ f4. I first dropped the ambient to where I wanted it, then set my TTL flash to bring the leaves back in without blowing-out all the detail in the snow. I use as low an ISO as possible so I don’t tax my flash as much when trying to over-power the ambient.
Second-Curtain Sync
By default, the flash is set to fire when the first curtain of the shutter opens. In Second Curtain Sync mode, the flash won’t fire until the second curtain starts to move. This is useful when the photographer wants to produce light trails in conjunction with flash and a slow shutter speed.
This means that the ambient has a chance to do its thing, and just before the exposure ends, the flash fires. This can help light trails make sense as the they will "follow" the subject rather than precede it due to the delayed firing of the flash.
(Multi) Stroboscopic Flash
Not too many photographers use this feature, but is useful and can produce really cool effects and can even help analyze motion. Stroboscopic flash is when the flash fires at a particular power level and frequency during an exposure. The frequency, in hertz (Hz), is determined by the power setting of the flash. The higher the power, the lower the frequency.
Ideally, a slow shutter speed of at least 2 seconds and a totally dark room make the effect work very well. Also, because of the slow shutter speed, a tripod is needed. Once the exposure starts, the flash will fire at a certain frequency.
The formula for this is:
Number of Flashes ÷ Firing Frequency = Shutter Speed
Stroboscopic can show, in a single frame, how something moves in a stretch of time.
Wireless Remote Flash
Getting the flash off-camera is where flash photography gets seriously interesting. And many hot shoe flash units can do so wirelessly. With no cables needed to connect a flash to the camera, they can be placed almost anywhere. Wireless functionality not only gives the photographer a huge amount of flexibility, but also keeps the set clear of tripping hazards caused by cables and cords.
There have been various ways to use flash wirelessly, but more modern flashes and camera systems operate in a much more advanced method with loads of sophisticated functions — all controlled by a single unit or camera. This controlling unit is called the "Master" (Canon) or "Commander" (Nikon). For now, only the top-end flashes have this functionality. The lower-end models can only act as normal on-camera flashes or "slaves".
Slave units can be triggered a variety of ways: optically, infrared, or radio signals. And some more advanced units, including big studio flashes, support all three, including a fourth method: tethered.
To control other flashes one needs a flash unit that can be set in "Master" or "Commander" mode and other flashes that are compatible to the signals emitted by the master. The remote flashes need to be set "Slave". Depending on the brand, remote flashes can be triggered in various ways. For example Vivitar 285HV flashes can be optically triggered or triggered with radio signals via a PocketWizard or some other radio transmitting device.
Wireless flash systems used by both Canon and Nikon can control many remote flashes, usually 4 flashes per group with a 3 group maximum in TTL mode. That number can go up if the remotes are in Manual mode.
Photographer Joe McNally is famous for using complex lighting and even an insane number of small flashes to achieve stunning effects. He has been able to use something in the neighbourhood of 50 small flashes, to light airplanes and large groups.
Wireless flashes gets light off-camera and off-axis, expanding the creative options available to the photographer because now he/she can put the light almost anywhere. Limitations to wireless flash depend upon how the system communicates.
Optical and infrared depend on line-of-sight in order to receive signals from the Master unit, especially outdoors where signals cannot be bounced off surfaces like walls.
Distance is also a factor with optical/infrared wireless flash systems because the signal will be too weak past about 60 feet. On the other hand, radio triggers like PocketWizards don’t need line-of-sight and can be placed at great distances, like the opposite end of a football field. The trade-off with radio triggers is the higher price for the increased capabilities.
There are more economical solutions to both the optical and radio trigger systems. For example, one can buy a Vivitar 285HV and a Wein optical slave receiver for around $110. An additional Canon 430EX II or Nikon SB-600 would cost $270.
Cheaper alternatives to PocketWizards would be RadioPopper JX or the really cheap Cactus V2 (eBay triggers). Going cheaper usually does reduce reliability and/or capability, but the cheaper competition in radio triggers at the RadioPopper-CyberSync price range have received rave reviews.
Ratios
This partly ties-in with the Wireless Remote Flash and Flash Exposure Compensation using two or more flashes. In multiple flash scenarios the overall output can be rationed between the two, three, or more groups of flashes. This is useful when the photographer desires to distribute either evenly or proportionately a total amount of light.
In an A : B flash situation, the distribution is as follows (with 1/3-stop between each): 8:1, 4:1, 2:1, 1:1, 1:2, 1:4, 1:8
This means that in an 1:1 ratio, the flash output of A and B groups is even. In a 4:1 ratio, group B gets 1/4 less power than group A. These ratios are based upon the flash exposure compensation dialed-in by the photographer. So, if a +1-stop of flash is dialed into a two group flash setup with a 1:2 ratio, group A would fire 100% of that +1 and group B would fire 50% of that +1.
Using ratios is an excellent and fast way to distribute light across multiple flash units. The photographer can -1 his ambient, +1 the flashes, and then distribute that flash proportionately between them.
Conclusion
Hopefully, this has been a helpful reference guide to the many built-in functions and capabilities of your hot shoe flash unit. Remember that not all flashes have all the mentioned features, but many do.
With a lot of practice, all these modes for your flash (as well as when to use them) will become second nature. For more detailed information, inspiration, and great how-to’s I strongly suggest you head on over to David Hobby’s blog,
Strobist.com, as well as Joe McNally’s website at
JoeMcNally.com. The Strobist.com helped me better understand the usefulness of Manual flash and Joe McNally helped with TTL-controlled flashes.