Thứ Hai, 28 tháng 2, 2011

15 Top Tips for Band Photography

Working as a music photojournalist can be very rewarding and a great way to develop skills in demanding situations. This simple 15 step guide aims to give you an insight into the world or music photography, both for promo portrait shots and in a live setting.


Step 1 - Finding a Band

There are always bands looking for photographers for promo shots, so all you have to do is make sure they find you! It’s pretty much a given that a band has a MySpace page or website, hopefully with contact details, which will enable you to offer your services. You can either search for bands in your locality or artists that take your fancy and would be interesting to work with. It’s great to work with young bands as they’ll be excited by the prospect of a photo shoot and want to do something exciting. On the other hand, bands with a higher status will be able to showcase your work to a larger audience.
band photography tips
Original Image on Flickr

Step 2 - Organisation and Payment

Once you’ve got the job, ensure that you communicate with your clients. Bands aren’t always great at maintaining correspondence, so try to organise the time, date and location well in advance.
It is also important to organise payment at this point. The majority of smaller bands won’t have a lot of cash to spend and if you’re just starting out, it is hard to charge significant amounts. At the least, ensure they cover your costs. Once you’ve built up a positive reputation, you may feel more confident in charging the bands you work with, especially if you’re trying to make a living from it!
band photography tips
Original Image on Flickr

Step 3 - What Is the Shoot For?

Artists will always need photos for general use on the web and press articles, but there can be a specific need for photographs – possibly a record insert or a particular magazine article. If this is the case, it is important to ensure you know exactly what the requirements are. If the shot is for a specific magazine it may need to be a certain shape or size on the page, or if it’s the cover, there may need to be space for the magazine name across the top. It is also important to know if there are any requests from the bands management or PR company. You don’t want to be spending time on a shoot, just to find out that it’s not what the people in charge wanted!
band photography tips
Original Image on Flickr

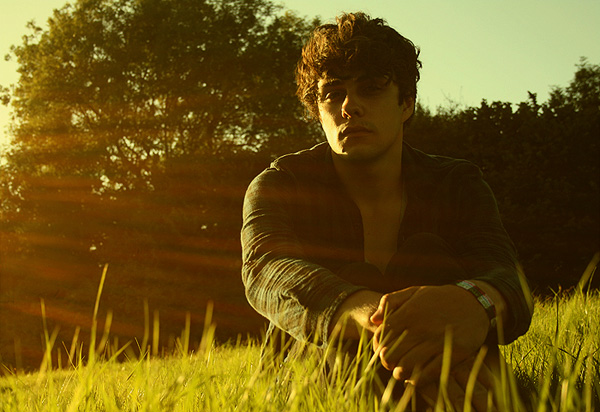
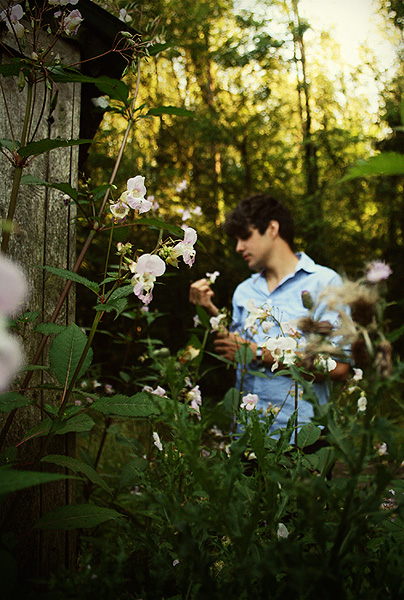
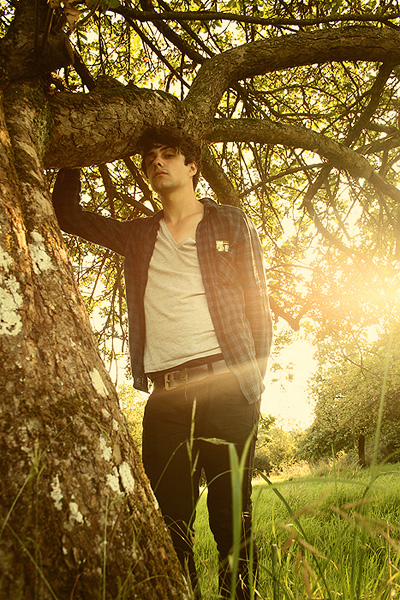
Step 4 - Develop a Theme

Depending on the purpose of the shoot, you will need to develop a theme. When communicating with the band, put forward some suggestions of concepts and ask them to think about the type of images they’d like. Some bands prefer rather standard (and possibly cliched) shots of themselves wearing their favourite clothes in an industrial estate, but try to be more imaginative and try something new. Props and costumes can work well and often the lighting and location offer a significant amount of interest. Try to create something unique that will mean both you and your clients will get noticed.
band photography tips
Original Image on Flickr

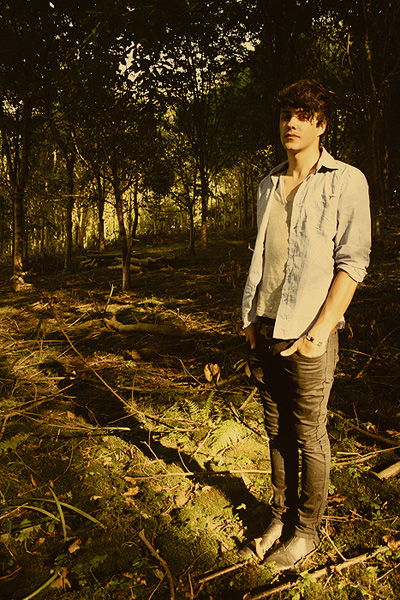
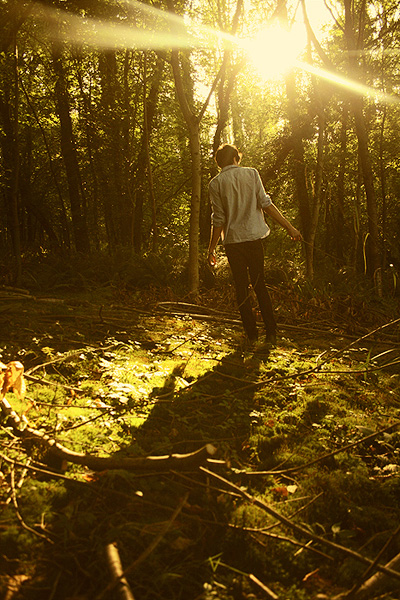
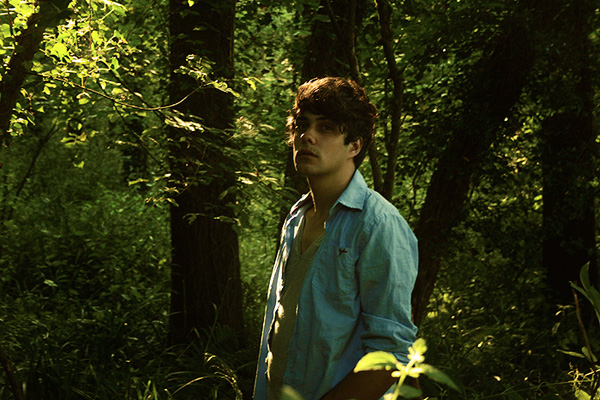
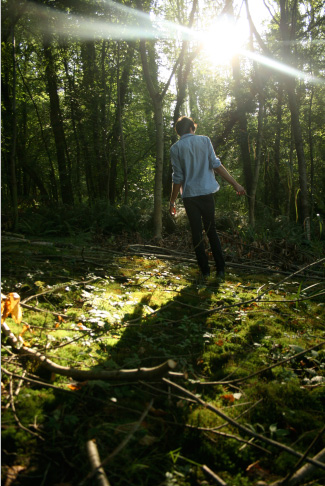
Step 5 - Find a Location

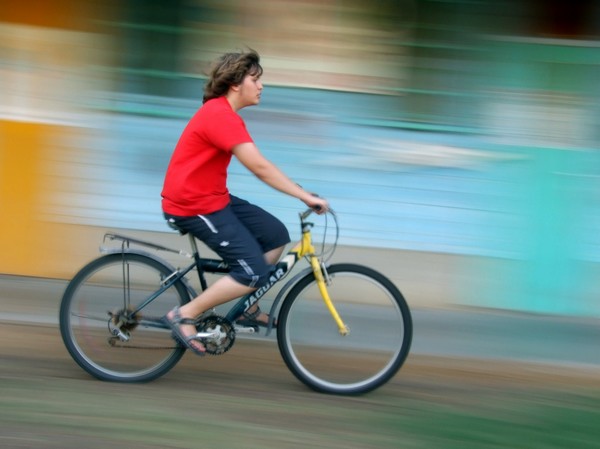
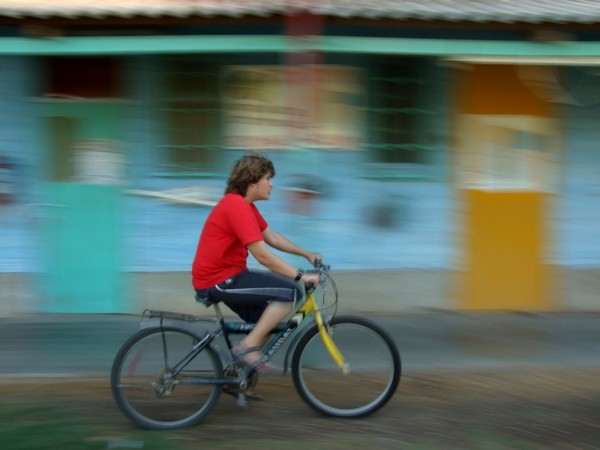
Location is all-important when working with an artist. For shots that require clean backgrounds and a sole focus there is always the studio option, but it is far more interesting to find a location that will help to enforce the band’s image and style. Once again, ask the band whether they have any ideas of accessible places which they think might work, but be sure to think up a few of your own options.
Make sure you listen to the artist’s music so you can get a feel for what might be suitable. For bands that operate within cities, it can be good to epitomise this by finding an urban location that supports their image. Artists with a more refined edge might like to use an old country manor for example, but wherever you end up choosing, ensure that you have access so you don’t end up trespassing. If you know that the location you’ve chosen is private land, it’s always best to ask the landowner before you start trooping bands and camera equipment around!
band photography tips
Original Image on Flickr

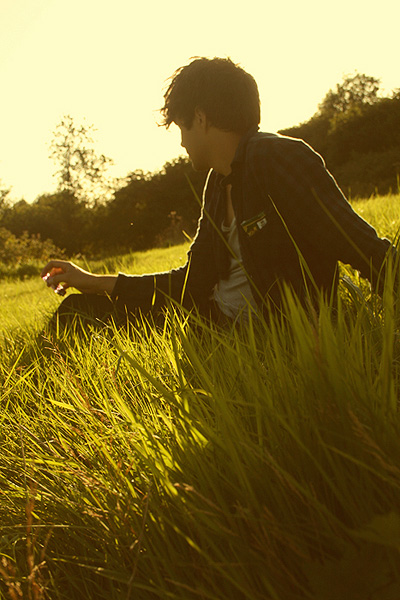
Step 6 - Capture Personality

After you’ve got everyone together, found your location and decided your concept, it’s time to actually start taking some photos! There’s a lot to think about on the day, so try to make as many decisions as possible before getting the camera out. Once at your location, select a few hotspots that you’d like to use, places that will work best for you and the image.
Don’t be afraid to take charge and tell your subjects what you’d like them to do. The composition of the shot is vital, try to organise your band members into interesting shapes. The chances are they’ll create a natural formation, but it’s good to make sure that if there is a front man or leader that it’s decided with the band whether or not he/she will take centre stage. Remember that a band consists of as many personalities as it does members and if you can, aim to capture each of those within the shot.
band photography tips
Original Image on Flickr

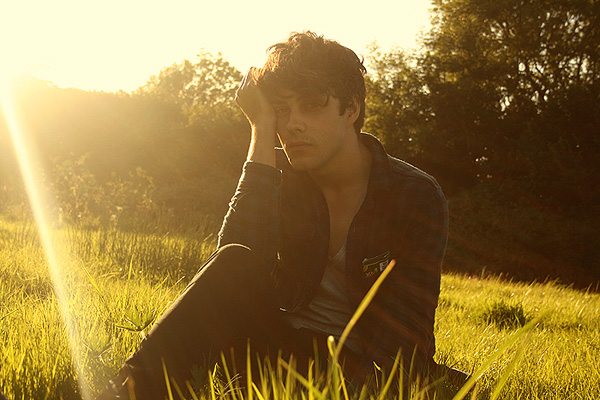
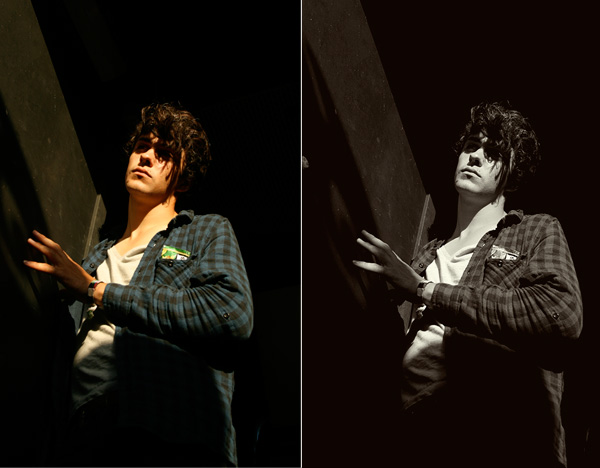
Step 7 - Be Creative With Lighting

Each shot will have it’s own lighting requirements, but when you’re shooting, consider it a multiple portrait shoot, so you should aim to have enough light to see each subject’s face and features. This will depend a lot upon location and time of day, but almost regardless of that, it is good to have a flash with you to highlight faces. Try to u advantage se the light sources available, be it through a window or direct sunlight, to your. Experiment with different angles and get your subjects to move about to see what works best. There are always ways to be creative with lighting, particularly when working with a particular concept or theme.
band photography tips
Original Image on Flickr

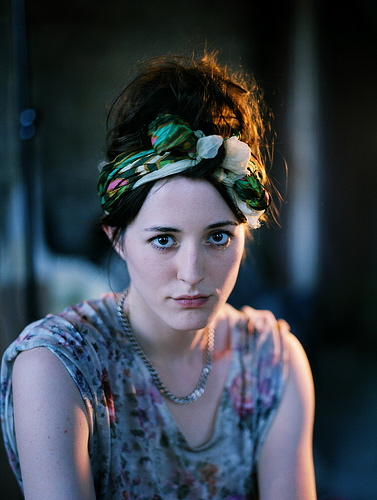
Step 8 - Picking the Best Shots

Choosing the final shots is always difficult, as there are often many to choose from and a huge range of post-production possibilities. The best shots are usually the strongest compositionally. Look for the shot with that extra sparkle, for example, a special connection with the eyes of the subject. However, it’s essential to remember that it’s a joint decision between yourself and the artist. They are employing you and although you may have a considerably better photographic understanding, bands often know what they want. Choose a good selection of shots to propose to the artists and work together to pick the best ones.
band photography tips
Original Image on Flickr

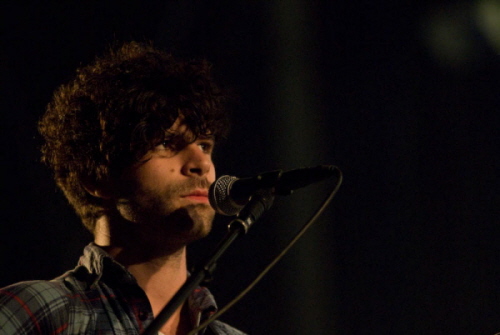
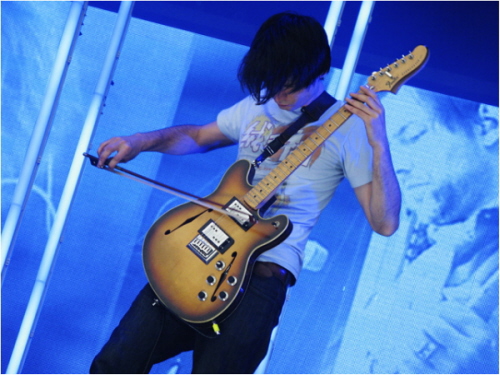
Step 9 - Live Performance Photography

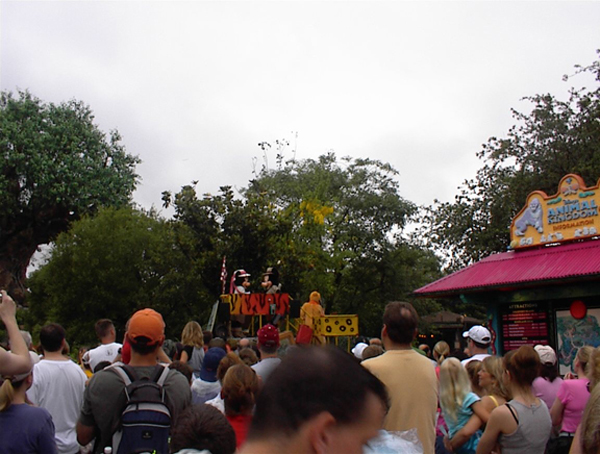
Live photography of musicians are a completely different practice. There are far more constraints on what you can do, and how you can use your camera. For small-scale shows, the lights are often quite primitive and you won’t have much space to work in. Bands might specifically ask you to photograph them at a show, or you could just head down to your local venue and take some shots. You can then offer the band your contact details and a website to view and buy/download images.
For large scale shows you’ll need a photo pass (usually obtained by newspapers, magazines and websites), which allows you between the stage for a pre-determined number of songs (usually the first three). You may not have much time to get your work done. Make sure you go prepared – you’ll need a zoom lens and sometimes even a small stool will help, so you’re not breaking your back to get the shot you want.
band photography tips
Original Image on Flickr

Step 10 - Be Familiar With the Music

Every band and artist is different and although you can apply many of the same photographic principals, the way a band plays and moves on stage will coincide with the music they are making. It helps to familiarise yourself with the music so you know what to expect on the day. Some bands will just stand still, others will leap around for the whole evening. You want your shots to capture the essence of the music visually, by freezing the artists and mood of the show all in one frame.
band photography tips
Original Image on Flickr

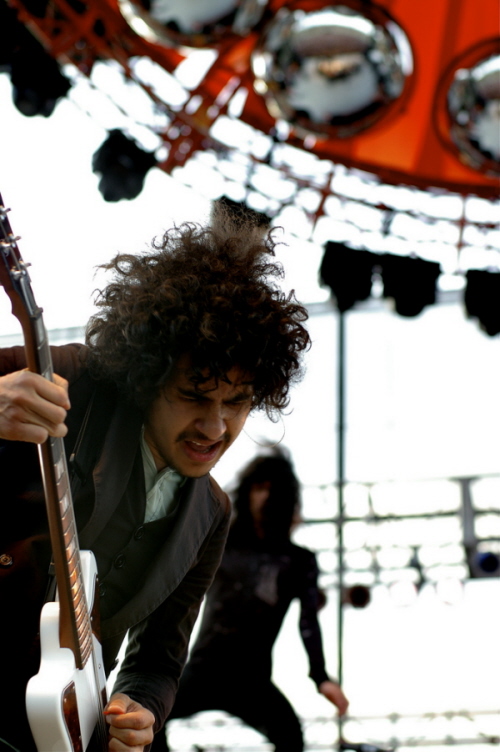
Step 11 - Focus on the Front Man

There are many ways to make your shots interesting and it helps to have a few ideas up your sleeve before you start shooting. Find a good vantage point, from which you’ll be able to see the key members of the band. Try to focus on one band member at a time, the most important being the front man/woman. They often act as the face of the band, the person that the public will recognise, so ensure you have a an interesting angle to shoot them from!
band photography tips
Original Image on Flickr

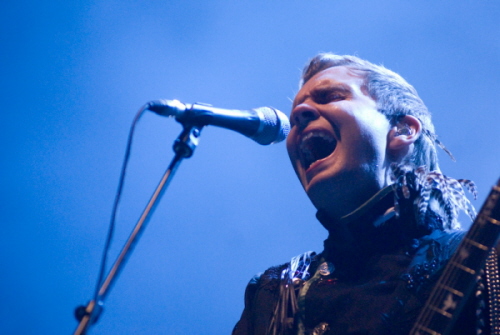
Step 12 - Embrace Coloured Lighting

At large shows, flash is not permitted, so you’ve got to do your best with the lighting available. There are usually vast amounts of coloured lights above the stage, so take them into account when positioning yourself, they often work well when trying to silhouette band members. The variety of lighting isn’t something you can necessarily plan for so don’t be afraid to experiment.
band photography tips
Original Image on Flickr

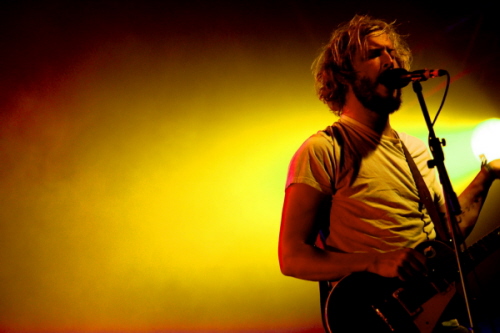
Step 13 - Consider Settings in Advance

The biggest challenge for photographers at live music events is darkness. Lighting is very specific, leaving large areas of darkness on the stage, and the way to combat this is by using the ISO and shutter speeds effectively. To let as much light in as possible, push up the ISO, decrease the shutter speed and open up the aperture. Shooting in RAW helps, but by no means is it a get-out clause for taking underexposed shots on the day. The best thing I can suggest is to know your settings before you start. If you’ve only got 3 songs, you can’t afford to be spending too much time playing with settings.
band photography tips
Original Image on Flickr

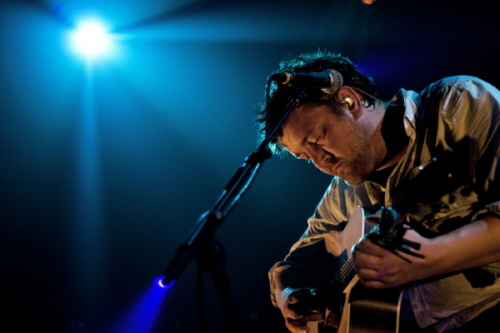
Step 14 - Pick the Moment

It’s really important to learn to shoot instinctively. You have to be patient, ensure that your camera is ready, and track your subject. Wait for the perfect moment and then take your shot. It’s such a horrible feeling to take a shot and then have to wait for your camera whilst watching the front man pull off his best move. You always have the option of continuous mode, but be careful – this is no substitute for your instinct and knowing when to press the button!
band photography tips
Original Image on Flickr

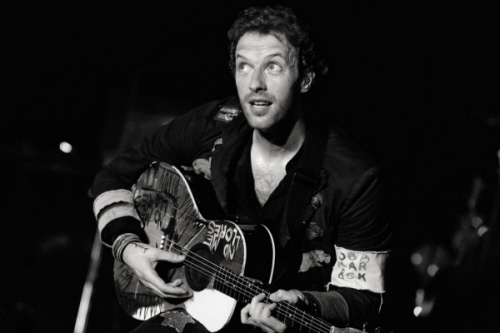
Step 15 - Get Credited

Whether it be in print or online, make sure that the right person knows that you took that shot! It’s a great way to make a name for yourself, and you can even ask whether than can put your web address as well as your name. The most important thing is to enjoy it. It’s a great feeling to photograph your favourite bands, but remember, you’ve got a job to do. You can start singing along when you’ve got your shots!
band photography tips
Original Image on Flickr

Chủ Nhật, 27 tháng 2, 2011

How to Set up and Shoot an Enchanted Photoshoot in the Woods

Final Product What You'll Be Creating

In this article Miguel will be taking you through the process of a portrait-based outdoor photoshoot on a budget. The only things you need to recreate this collection of images are yourself, a friend or client, a camera with a lens and the great outdoors. This set of tips will show you that you don’t need an expensive setup of lenses, reflectors and lights to create stunning portraits to be proud of.


1. Introduction

This series of portraits was recently taken for a local client to serve as promotional shots for his solo musical project. His brief to me was that he wanted the photographs to not necessarily feature himself as the main focus, but rather of the beautiful surroundings with himself within them. He didn’t want the photos to be cliché or cutesy, and he requested that they were to be as natural as possible.
In the following steps I hope to show you what it takes to nail an outdoor photoshoot with as little equipment as possible, cover the difficulties you might encounter, and share several killer tips for working in the field—no pun intended! You can catch the full collection of these images on Flickr.

2.Equipment and Props Used

  • Canon 400D Digital SLRenchanted woodland photo shoot camera with standard 18-55mm lens kit. For this purpose, try to use a DSLR for best results, but any digital camera can be used as long as it has some manual control of exposure.
  • Model/subject with an extra change of clothes. One reason it’s smart to bring an extra set of clothes is that if you get one outfit dirty within 15 minutes, you don’t have to call off the rest of the shoot since you’ll have a backup change of clothes. Another reason you might do this is purely for variety. Different outfits instantly make your set of photos more versatile as a package, and this is a bonus for both your portfolio and the client’s promotional material.
  • Adobe Photoshop, for post-processing the photographs.

Step 1

Choosing the right time and weather conditions
Believe it or not, a sunny day is a pain for taking portraits more often than not. You get models squinting in the sunlight, nasty blown-out skin highlights as well as incredibly difficult to tame exposure—you either end up with shaded areas that are too dark or brightly lit areas that are too bright. It’s a nightmare!
Slightly duller and cloudier lighting can be the best to diffuse the light evenly, and even if the photos look dull in-camera you can always add the needed punch later in Photoshop. Remember—it’s next to impossible to bring back detail in a photo. This applies to blacked-out shadows and blown-out highlights, so ideally you’ll want tonal information in both ends of the light spectrum.
Time-wise, the best period of the day to shoot is just after sunrise, or for the lazy, just before sunset. This time period skips the intense afternoon sun that creates harsh lighting conditions and it can create lovely long shadows due to the sun being so low in the horizon. But make sure it isn’t too close to sunset either, as light escapes quicker than you realize. A good rule of thumb I have is to go out and shoot approximately one-and-a-half to two-hours before sunset. This set of photos took place between 17:30 and 19:30 during early August in the UK.
enchanted woodland photo shoot

Step 2

Camera settings
For the vast majority of the photographs, I shot in Av mode which adjusts the shutter speed automatically to calibrate against the desired aperture. During this mode, you’ll want to have your aperture on about 5.6 to make sure you still get nice, sharp focus, though you can go as open as your lens allows if you find the shutter speed is slower than 1/30.
If you still find that with the widest aperture your shutter speed is still too slow, you may need to increase the ISO at the cost of some grain in the image (and DSLR grain is not the good type of grain).
Many would advise you to use a tripod, but I personally feel the dynamics of doing a natural photoshoot with a tripod to be too slow and cumbersome. Ideally, you need to constantly move around, be creative, get down low and up high from one shot to the next, which isn’t possible with a tripod. It definitely feels less organic and you want to keep a fast paced, positive uplifting atmosphere with your model.
Having said that, it doesn’t hurt to be prepared if you need to capture that one shot that seems to come out blurry every time.
Another thing I’d like to mention is that I find the automatic metering (be it with shutter, aperture or full automatic) will come out too bright. If you have the option, move the exposure metering down a couple of notches so the automatic modes create a slightly more low-key photograph. I tend to find the shadow areas are easier to recover light detail from than the overly bright areas.
enchanted woodland photo shoot

Step 3

When you are in the woods at this sort of time, you can usually find pools of light on the floor created by the sunlight leaking through the trees, which breaks up the shadows they cast. The aforementioned long shadows created by a low sun can be integrated within these ‘pools’ of light to create interesting light compositions.
Setting your lens on its widest angle setting and getting close to the floor will emphasize the length of the shadow—as you can see in the image below. When making light and shadow your main concept in an image like this, having your subject face away from the camera and letting the sun create a rim of light around the figure can add to the charm of the image.
enchanted woodland photo shoot

Step 4

Don’t be afraid of the dark side
In areas of little light where the foliage is slightly denser, you can still position your subject to be mainly illuminated from behind by the sun, creating a nice rim light effect that can pop part of your subject from the background in these dim situations.
enchanted woodland photo shoot

Step 5

Try to add depth to your composition
When composing a photograph like this, one of the first steps I tend to take is to find a foreground to help add depth to the photograph. It’s nice to always have a foreground, middle ground and background in an image. If you get nice and low, you can usually find foliage to frame your subject. If you can incorporate a layer between the lens and the subject, that’s perfect. Try it!
enchanted woodland photo shoot

Step 6

Be creative with your focus
This step goes hand-in-hand with the previous. If you experiment with focusing on the foreground rather than your middle ground, you can be pleasantly surprised with the results. Doing so will add variety and interest to some of your photos, and I think you’ll agree that just because the model isn’t the main focus, this image is still just as good as the rest.
enchanted woodland photo shoot

Step 7

Experiment with tilting your camera sideways slightly. This can instantly make the feel of your image very different. It adds a certain edge that can make your shot.
enchanted woodland photo shoot

Step 8

I previously mentioned not to be afraid of the dark side. This applies equally to the bright side. You can position your subject so that he or she is facing the sun sideways, then position yourself in front of him or her and adjust your angle until you get a slight lens flare. There is nothing wrong with a bit of lens flare, but please use this sparingly! When used well, it can create a nice washed-out vintage dreamy effect.
enchanted woodland photo shoot

Step 9

A low angle can work well when trying to emphasize a figure
In this shot I tried to make the model the focus point so that he demands attention, and getting down low and using the tree trunk as a lead to the top of the image helped me achieve that. When shooting from below you tend to make a person seem menacing and authoritative, and similarly when you photograph someone from above they tend to be diminished and made to seem less important.
enchanted woodland photo shoot

Step 10

Some photographs work better as black and white images
In this particular shot, the original colors seemed to suck the life out of the photo. In Photoshop you can desaturate an image and then give it a subtle color tint. This will turn your photo into a more ‘artsy’ shot. Like in the example below, it makes the difference between binning a shot and keeping it in the final collection. When you think a photo doesn’t really work for you but there’s something about it that makes you wonder what could be done to salvage it, I suggest trying to desaturate it to see how it works in black and white.
enchanted woodland photo shoot

Step 11 – Post-Processing

Over the next few steps I’ll show you how I normally edit shots such as these, and the techniques I used when trying to bring that glowing warm essence of a summery forest to life before handing the shots over to the client.
The first thing you do when you open an image in Photoshop is to crop the image if needed. Next, you may want to duplicate the original layer into a new layer so you can always strip it back to the original if needed at any point, even if you mainly use adjustment layers.
enchanted woodland photo shoot

Step 12

You may need to adjust the contrast using a Curves adjustment layer, but the contrast of this image is pretty well balanced from the camera as it is. In that case, you would proceed to create a new Gradient Map adjustment layer, and tone it so that it goes from a warm orange to a lighter, yellower tone.
enchanted woodland photo shoot

Step 13

Bring the opacity of the Gradient Map layer to about 30% (or whatever looks best with your image). You can now start to see a more vintage and washed out tone.
enchanted woodland photo shoot

Step 14

Create a new Curves adjustment layer and adjust it so as to darken the shadow areas of the image, and set this adjustment layer’s mode to Luminosity.
enchanted woodland photo shoot

Step 15

A neat tip to help force attention on the middle of the photo is to create a new empty layer and fill it with Black, then get the Eraser tool with a soft round brush set to about 20% opacity, and start to erase into the main focus of the image so as to darken the edges of the photo. One thing I’d advise you to do is to always erase light areas such as light sources (the sun in my case), as otherwise they will look obvious when a vignette is applied to them.
enchanted woodland photo shoot

Step 16

Drop the Black layer to around 15%, as this effect looks best when used subtly. The Layers palette should look something like the one below.
enchanted woodland photo shoot

Step 17

Once you’ve saved your .Psd copy of the image you can flatten the layers, resize the image for web—which in this case is 600px high—and then slightly sharpen it by going to Filter -> Sharpen -> Sharpen. If the image looks overly sharp, you can fade the last applied effect by pressing Cmd+Shift+F, and in this example I set fade to 40%.
That’s it! You can then save your image. However, if you’re applying this look to a lot of photographs you could save a template version as a .Psd file right at the step before you applied the vignette, so that the adjustment layers are all still editable. Once you have another document open, you can simply drag these adjustment layers to the new image and adjust them as needed.
enchanted woodland photo shoot

3. Download Source File

Miguel has kindly provided the template he used to post-process his photo series. Download .Psd (2.2mb)

4. Conclusion

There are a few more tips that I thought I ought to mention before wrapping up:
  • Be trigger happy. Take along a few gigabytes worth of memory cards, because you never know just how well a photoshoot can go. You may find yourself using up dozens of photos trying to nail just one shot.
  • Remember to have fun and to have a good relationship with your model. If neither of you communicate, your model may start to feel uncomfortable and the quality of the photoshoot will ultimately suffer as a consequence.
  • Know your camera! It is beyond useful knowing how to properly operate your camera and the shooting modes it has to offer.
  • Know the basics of photography such as what affects exposure and some compositional concepts such as the rule of thirds.
  • Abstain from using in-camera effects such as sepia or black and white. You can always do this in Photoshop with a hundred-times more control, but you can’t get color back once you shoot without it.
  • If you don’t have Photoshop but want to recreate the same soft warm color-tone used in my photos above, a great little trick you can use while shooting is to hold the lens of a pair of brown gradient sunglasses in front of your camera’s own lens, as seen in the photos here.
Once again, you can see the full collection of images submitted to the client at the Flickr set here.

Thứ Bảy, 26 tháng 2, 2011

Capturing Dynamic Photos With a Panning Effect

Final Product What You'll Be Creating

Have you ever wished that there was way you could capture the sense of motion in a still picture? Well, today, using just our camera and a special technique we’re going to learn just to do just that. Panning is the art of tracking a subject with your camera – blurring the background, while keeping the subject in sharp focus.
We’ll be walking you through the equipment required, how to choose a subject & location, ensure the background is appropriate, and pan smoothly!


1. Introduction

“In photography, panning refers to the horizontal movement or rotation of a still or video camera” – Wikipedia. The basic idea behind panning is moving your camera along to follow a moving subject. If executed correctly, the result will be our subject (e.g. a biker riding a bicycle) “frozen” and sharp while the background is smeared in the apparent opposite direction, hence creating the illusion of movement.
While not simple to execute, panning is a very rewarding technique that can be used in a great variety of situations to produce a unique and outstanding picture. This tutorial is at intermediate level: some terms such as shutter speed and aperture are used but are not explained, if you are not familiar with them I recommend reading a few of the basic introductory tutorials on Phototuts+.

panning photography tutorial

2. Equipment

One of the great things about panning is that it can be achieved using almost any camera. There’s no need for a big and shiny DSLR, even a small compact camera could do the trick as long as it allows you full control over those 3 settings: shutter speed, aperture size and ISO sensitivity. It’s also possible to do with a film based camera. However, since panning is a lot of “trial and error” it’s going to be very hard (and expensive!) and not recommended unless you’ve already mastered this technique.
In addition to a camera, you should also bring along a good tripod. Although a tripod is not a must, it can make your life much easier as a beginner. For all the pictures in this article I used a Fuji S6500FD.

3. Choosing the right subject and location

There is one rule about the subject, it has to move! There are endless possibilities: A moving car, a running person, a rider on a bike, walking dogs and even jumping horses. Basically if it moves, it can be panned. Since panning usually requires lots of trial and error to get it right, a location where the same event repeats itself many times and usually at the same location is advised. i.e. if we want our subject to be a runner, we should try and find one of those running lanes or a promenade that can be found in many parks or by the sea. We then try and position ourselves in a place where our view of the subject will not be obstructed by anyone or anything else. A very important thing to remember is ensuring that there is enough room to move around and find the best spot.

panning photography tutorial

4. Choosing the right background

Now that we have chosen our location, we put our focus towards finding the right background. Since that one of the main goals of panning is for the subject to “pop out” of the picture, we need to make sure that our background is not distracting from the subject.
Try not to pick backgrounds that are considerably brighter than your subject, as they are likely to be over-exposed. If you can, find a nice plain background, because bright lights and sharp shapes might be distracting when blurred. Try to find a background that contrasts (red-blue, white-brown, blue-yellow etc’) with your subject, to make him stick out even more.
This is the background used in the final effect picture. It’s not too bright, has solid colours, and contrasts well with the subject’s red T-shirt.

panning photography tutorial

5. Setting your camera

Now that we have our desired subject, background and location it is time to get our gear ready. The first order of business is to change the camera shooting mode to manual. Now play around with the settings until you get a good balanced exposure (the camera histogram can come in handy here), trying to keep your ISO level around 100-200 and the aperture as closed as you can to achieve maximum depth of field in our subject
When we have a well balanced picture, we need to estimate the correct shutter speed. This is difficult, and depends on two main factors: the speed of the subject and the distance from the subject. The faster the subject is moving, the faster the shutter speed, and the closer you’re to the subject the slower the shutter speed.
You’ll need to play around with the settings until you get it right. Here are, for reference, average speeds for some objects – start out with these and do your own fine tuning until you get it right: walking person (1/10), bicycle rider (1/20), moving car (1/60). I recommend starting out shooting faster objects because camera shake becomes a larger issue at a slower speed. This step might be a bit frustrating, especially for beginners, so don’t give up until you get it right. In this picture the shutter speed was too high and the background was not blurred enough, so for the next attempt I slowed the shutter speed down a notch.

panning photography tutorial

6. Panning

Now that everything is ready, it’s time to put our photographer hat on and get started. The first step is to plan where exactly you want (and expect) the object to be in the picture. Try and find something that can be used as a mark; a road sign or tree for instance. It should be easy for you to spot during the action.
If your camera is not equipped with a good tracking auto-focus, you should set your focus on the marker by half-pressing the shutter button. Now the camera is focused and all that is left to do is take the picture! Identify your object and start tracking it with a steady, smooth motion. Try gauging speed and adjusting your own accordingly. Remember that the closer it is to you, the faster you’ll have to move your camera.
When your subject reaches the chosen mark, depress the shutter gently (to prevent unwanted camera shake) while still tracking the subject until you’ve heard the shot is complete. The key is to execute the entire movement as steadily as possible – study your subject, notice where it slows down and where it speeds up, and adjust your location if necessary. Done correctly, you should have a good panning blur with a sharp subject.
Some older cameras (or entry level point & shoot) have what is known as “shutter lag” problem. Shutter lag is when there is a slight delay between the moment you press the shutter and the moment the camera actually starts taking the picture. If your camera suffers from this problem, you’ll have to anticipate this lag and click the shutter a little earlier than expected.
For an appealing composition, place your subject towards the side of the picture, opposite to the direction of movement. It should look as though the subject has room to move into within the frame.

panning photography tutorial

7. Patience is a virtue

Panning is all about patience – it’s a trial and error process, and can be difficult to perfect. Try shooting as many images as you can until you get it right! Remember that nothing is set in stone, experimentation is key, and most importantly: have fun!

8. Another take on panning

In this article I focused on the more “classic” panning technique in which we’re moving our camera in sync with our object. However there is another way to achieve a similiar effect – instead of moving the camera, we’re going to be the one doing all the movement.
Imagine two cars driving side by side at the same speed – if you capture the car right next to you and set a low shutter speed, the same smearing effect will appear in . This technique is much easier to execute, although there are fewer situations where you are moving side by side with your object and at the same speed.
In this picture I was sitting in a carousel facing my brother and was shooting while we were going in circles.

panning photography tutorial

How to Capture the Perfect Parade Photo

Everyone loves a parade, but they can be very difficult to photograph. Very few people end up with satisfying parade photos. Let’s look at some relatively simple things anyone can do to get more effective, more satisfying photos of parades.

Step 1

Get in the front row. Everyone wants to be in the front row at parades but, if your goal is to get good pictures, you really really want to be in the front row. Otherwise, all your pictures may look something like this.
backs of people's heads

Step 2

Scout your position early (this will help with getting in the front row.) Specifically what you are looking for is to avoid busy backgrounds.
marching band
The thing about a parade is that you can’t really move once it starts. Whatever is in your background will be there for every shot you take. Put some care into selecting what kind of background is on the opposite side of the parade route from you.

Step 3

If you are unable to find a pleasing background, aim for at least a neutral one (see Step 5) but your best bet is one that is attractive.
Mickey through the years

Step 4

Take note of where the sun is (or where it will be during the parade.)
sun flare
The last thing you want is to be facing, and shooting, into the sun. Any strong, direct light shining onto your front lens element will cause lens flare. This will usually ruin all your pictures.

Step 5

Aim for the most even light possible. Your best bet would be a lightly overcast day but you can’t control the weather. One alternative is to get into the shadow of a tall building and adjust your camera’s white balance for shade, to maintain color fidelity.
Mummers

Step 6

Once you’ve found a position along the parade route with even light and a pleasing background and are in the front row, get down low. Sit on the ground if you can.
get down low
The point here is that you want to be shooting up at the parade floats. This will do several things for you.
  • Shooting up at the parade floats will have you shooting over the heads of all the people standing on the opposite side of the parade route. That means they will not be in the background of every picture you take.
  • Any time we are looking up at something, it seems larger and more majestic. This will translate photographically and make the subjects in your photos seem more grand.
  • This is a different vantage than most people are used to seeing. Any time your photos show something different or show a subject from a different perspective, that automatically makes your pictures more interesting than they would otherwise be.
  • Shooting upward means your backgrounds will be primarily sky. This makeas it easier to find a neutral or pleasing background. (See steps 2 and 3, above.)

Step 7

Once the parade starts, you may have crowds moving in for a better view. This means people pushing and jostling you. That may cause camera shake which can ruin your photos.
blurry from camera shake
There are several possible solutions to this problem:
  • Have a friend stand behind you to act as a buffer. Your friend takes all the jostling from the crowd but keeps them at bay so you can get your shots in relative peace. (Do something nice for your friend afterward!)
  • Position yourself in front of something solid such as a lamppost.
  • Or a fire hydrant.
  • Even a trash can.

Step 8

Parades and parade floats usually have moving subjects. Be careful to observe everything that’s moving and try to anticipate what they will do.
bad timing
You don’t want to snap your photo when one of the key moving figures on the float is looking away or hidden.

Step 9

Get physically close, at least as close as you are allowed, and then zoom in.
fill the frame
Don’t be obsessed with having the whole float visible in your frame. Go ahead and zoom in on smaller details or single characters. This will make your pictures more exciting and the broader whole will still usually be suggested in the final image.

Step 10

When zooming in, just be careful not to zoom too much and end up cutting off important parts.
headless prince
What you want is parts that are representative of the larger whole. Not headless people!

Step 11

If the parade takes place at night, chances are it will be lit in some way.
Cinderella's carriage
Very often the floats themselves will have their own light sources. Less often, there may be some kind of floodlights, spotlights or threatrical lights shone upon the floats as they pass by.

Step 12

Even with the parade floats having their own light source, your camera may have trouble taking satisfying pictures in a darkened environment.
blurry float
Higher ISO leads to noise, longer shutter speeds may lead to camera shake. It’s always a trade-off.

Step 13

Sometimes you can deliberately use blur for artistic effect.
artistic blur
It can be hard to do. Your best bet is usually to keep the camera very steady and let subject movement cause the blur. This requires longer shutter speeds. Actual speed will vary depending on the speed your subject is moving but start in the 1/10th to 1/30th second range.

Step 14

As it gets dark, your camera may want to use flash.
flashlit float
Just be warned that on-camera flash is generally not very powerful. Unless you are very close to the float, it may not do much to give you better light and may run down your camera’s battery faster.

Step 15

While using flash is sometimes legitimate, this may not always be the effect you want.
Chip and Dale
A shot like the one above would have had a completely different character had flash been used. Try to visualize the end effect you are going for and make a conscious decision whether or not flash will help you acheive that effect.

Summary

Parades can be great fun to watch, however, getting truly good pictures of them involves a lot more than many people realize. The tricks are relatively simple, but you have to know them and use them if you want good pictures to show off to your friends and family.